So, my experiments in capacitive sensing have all been in aid of creating a device that can be used for interactive sex games. This post focuses on the design of a masturbator device.
In order to make a silicone device, I need a “negative” mold to pour the silicone into.
I started with a model that I discovered online, called the Helisex. It’s designed is in two parts that your pour silicone into. Once the silicone cures, you release it from the mold and you have your glorious masturbator. The twisty center piece is designed to stimulate your member when you insert it into the silicone toy.
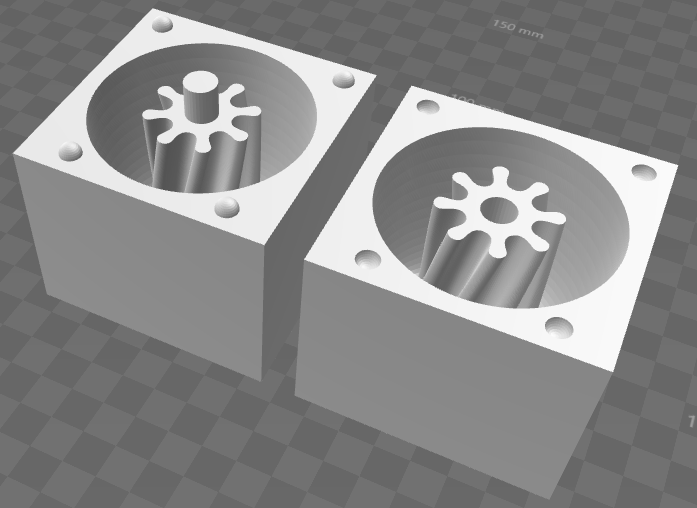
My intention was to design something that could have layers of conductive and un-conductive silicone so I could detect how far in the dong went. The helisex design would have been very hard to layer silicone into, so I separated it into four pieces:


Note that since I was 3D printing these parts, there’s no way I could simply split the model into 4 equal parts, because the center piece would have nothing to connect to. I decided on the “tower in the base” approach, because that could allow me to cover the center piece in un-conductive silicone.
Conveniently, a friend of mine has a 3D printer and was able to print the models for me.
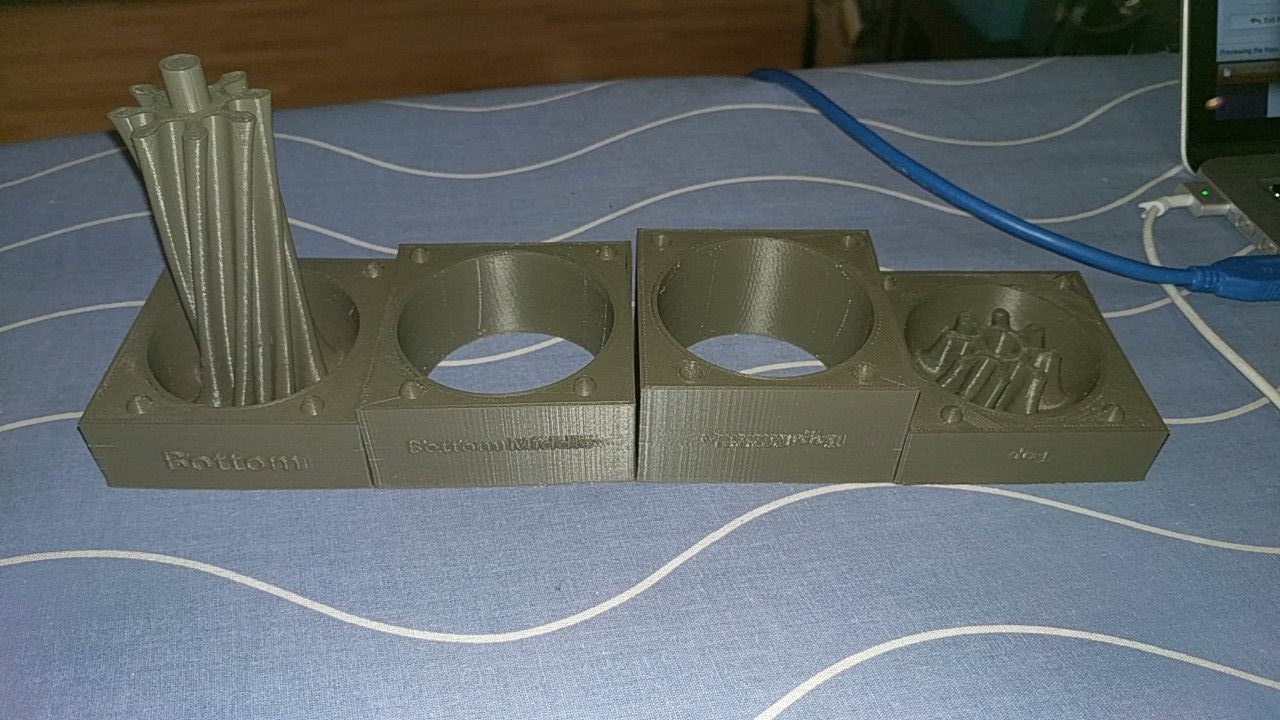
The 3D printed objects came out very well.

After the models were printed, I set about sanding. I had to get the top piece re-printed because I had misjudged the height of the center column by 10 mm.
I sanded every piece with 180 grit sandpaper to help get rid of the ripples that is characteristic of 3D printed parts. I then sanded with 240 grit and 400 grit. To be honest, I think the 180 grit did all of the work and the other sand paper didn’t make much difference to the result.

The little plastic nubs and cavities were built into the model to allow them to line up properly. The “Negative” cavity was invariably too small (or the nub too large) because I didn’t realise I needed about 0.5 mm clearance either side.
No matter, a drill bit and elbow grease soon fixed that problem! I took a drill bit and filed out the excess from the part. This turned out to be quite easy since the ABS plastic is relatively soft.
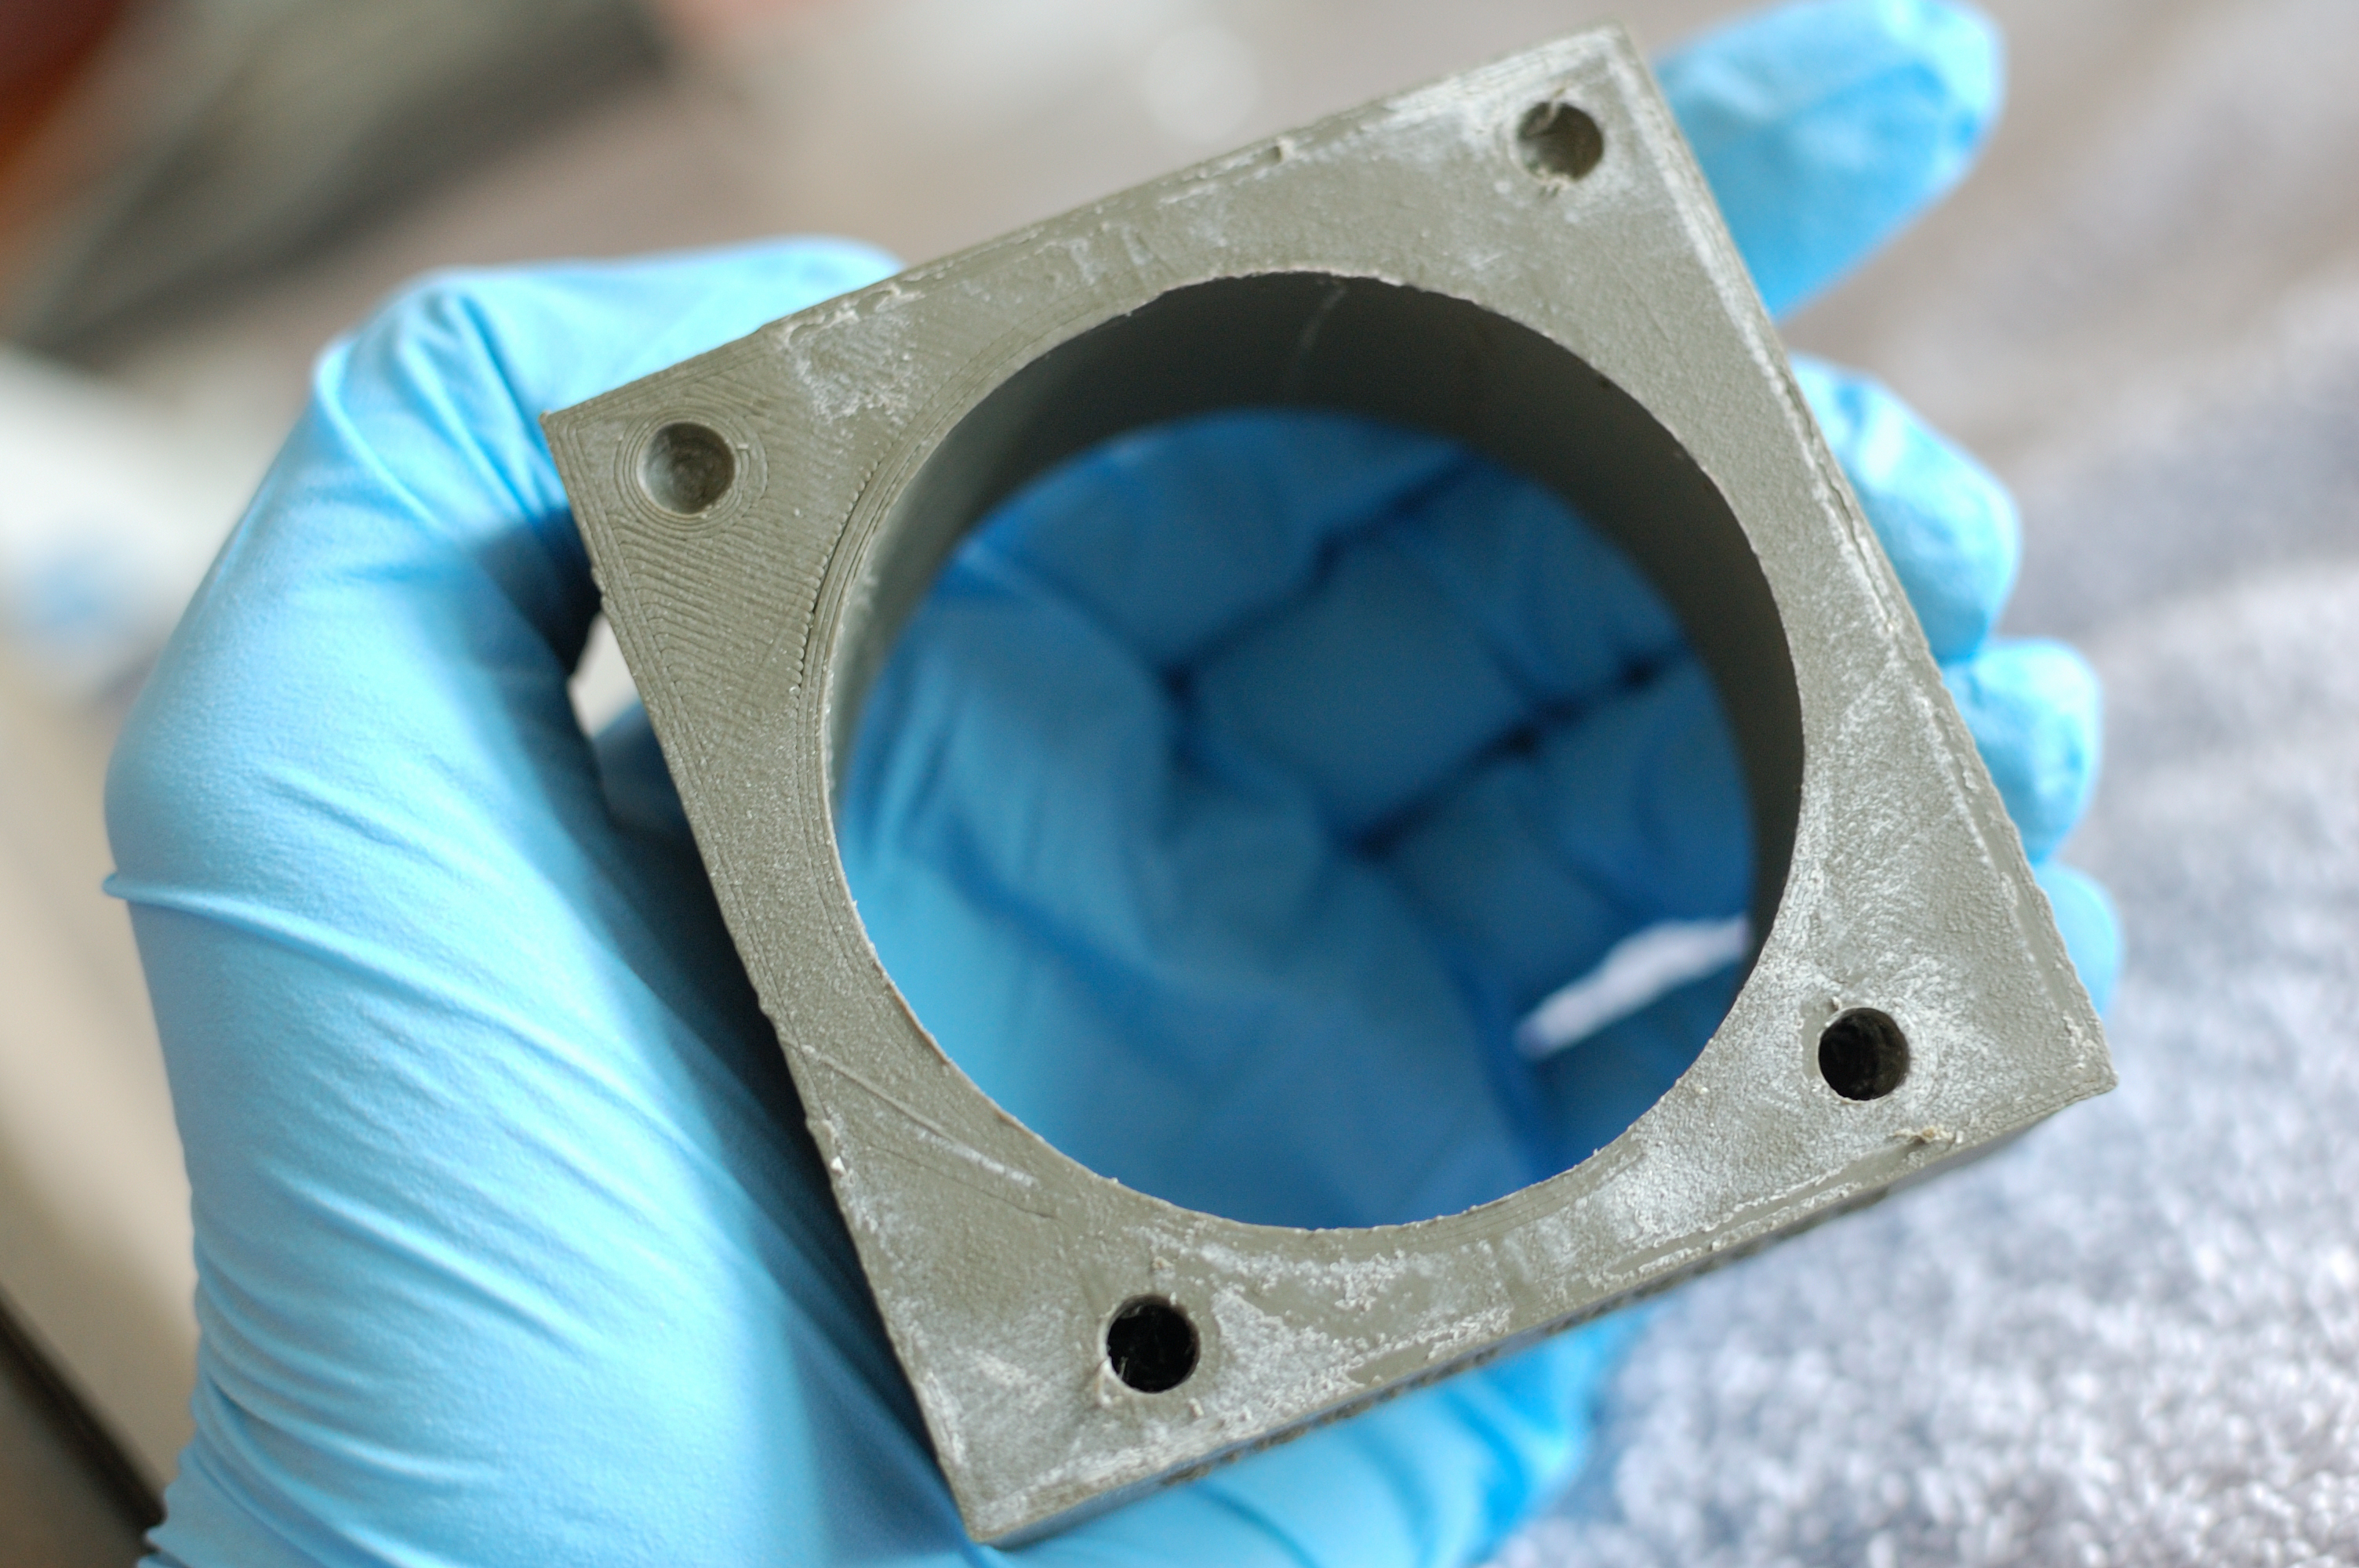
What I didn’t realise is the “wall” of the 3D printed part is only about 1mm thick, so a little vigorous filing will easily perforate the wall of the printed part. Fortunately this was not a big deal and in hindsight, I would have probably been better off with holes for bolts anyway rather than fancy little nubs.
I learnt a few things out of this exercise:
- ABS plastic warps (unlike PLA) so although ABS will last longer and is definitely safe with silicone, PLA might be a better choice if the mold parts need to fit together perfectly.
- About half a millimetre of clearance is required for parts to slot into each other, this can be achieved by sanding.
- Chunky mechanical connections are better than fiddly ones.
- Making holes all the way through is better than a cavity part way through.
- 2mm is the narrowest you want to make any piece in a 3D printed object
- The outer “shell” of the 3D printed part is thinner than you think and you can easily perforate it. If you do, it’s not the end of the world.
- 3D printed parts work well subtractive, that is to say: you can always shave something off the model more easily than adding something.
One thought on “Designing the mold for a sensing Masturbator”